
Welcome to the Patiowell 10×10 Shed Instructions guide. This comprehensive manual helps you assemble and maintain your durable, weather-resistant shed. Follow the steps carefully for a successful setup.
1.1 Overview of the Patiowell 10×10 Shed
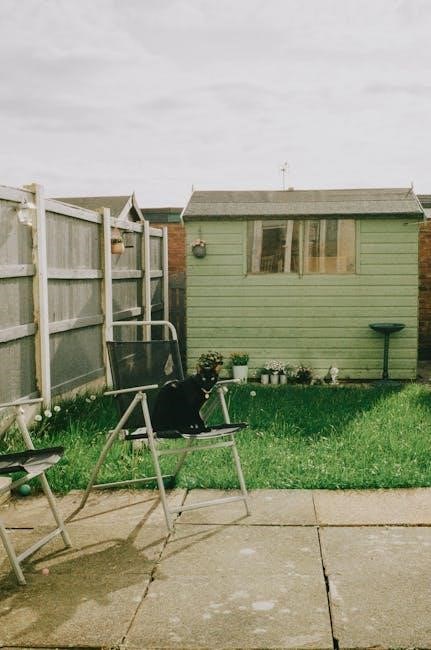
The Patiowell 10×10 Shed is a durable, weather-resistant storage solution designed for backyard use. Crafted from high-quality, rust-resistant metal, it features a robust structure with a gambrel roof for added storage capacity. Built-in vents ensure proper airflow, reducing moisture buildup and protecting contents from mold. Ideal for storing bikes, tools, and outdoor equipment, this shed offers a spacious interior and easy assembly with step-by-step instructions. Its compact size fits neatly into various yard layouts, providing functional storage while enhancing your outdoor space.
1.2 Importance of Following the Instructions
Following the Patiowell 10×10 Shed instructions is crucial for ensuring a safe, correct, and efficient assembly process. Proper adherence prevents damage to components, avoids safety risks, and guarantees the shed’s stability and longevity. Failure to follow instructions may lead to structural issues or void the warranty; Take time to review all steps before starting, and refer to the manual regularly during assembly to ensure every part is installed correctly and securely.
Preparation Before Assembly
Begin by reviewing the instructions and ensuring all components are complete. Prepare tools, check for damage, and confirm all parts are included for a smooth assembly process.
2.1 Tools and Materials Required
To assemble the Patiowell 10×10 shed, gather essential tools like screwdrivers, wrenches, and a hammer. Ensure you have all hardware, panels, and framing components. Check for rust-resistant screws, weatherproof sealants, and concrete screws for anchoring. Verify the presence of all parts before starting to avoid delays. Organize tools and materials to streamline the assembly process and ensure a secure, durable structure. Follow the provided list to confirm everything is accounted for.
2.2 Site Preparation and Leveling
Before assembling your Patiowell 10×10 shed, ensure the site is clear, flat, and level. Choose a firm, dry area, adhering to local building codes. Remove debris and vegetation, then check the ground’s evenness using a spirit level. If necessary, dig and fill uneven areas to create a stable base. Proper leveling ensures the shed’s stability and prevents structural issues. Use a shovel to finish leveling, ensuring the surface is compact and even for secure anchoring.

Key Features of the Patiowell 10×10 Shed
The Patiowell 10×10 Shed is crafted from high-quality, rust-resistant metal, offering exceptional weather resistance and durability. It features built-in vents for airflow and a spacious design for ample storage.
3.1 Weather Resistance and Durability
The Patiowell 10×10 Shed is crafted from high-quality, rust-resistant metal, ensuring durability and protection against harsh weather conditions. Its anti-corrosion and pest-resistant design withstands rain, wind, and UV rays. Built-in vents promote airflow, reducing moisture buildup and preventing mold and mildew. This shed is designed to endure outdoor elements while keeping your belongings safe and secure. Its robust construction ensures long-lasting performance with minimal maintenance required.
3.2 Design and Storage Capacity
The Patiowell 10×10 Shed features a spacious interior with a taller and deeper design, offering ample storage for bikes, tools, and large equipment. Its gambrel roof provides additional loft space, maximizing storage capacity. The wide access doors allow easy entry for bulky items, making it ideal for organizing your garage and freeing up space. This shed is perfect for managing outdoor gear and keeping your belongings neatly arranged and accessible.

Step-by-Step Assembly Instructions
Begin by unpacking and organizing all components. Follow the illustrated guide to assemble the frame, walls, and roof. Each step is designed for ease and accuracy.
4.1 Unpacking and Organizing Components
Begin by carefully unpacking all components from the packages. Ensure all parts are included and undamaged. Organize the pieces on a flat surface, referencing the instruction manual. Handle sharp edges with care to avoid injuries. Lay out smaller hardware separately for easy access. Cross-reference the parts list to confirm everything is accounted for before starting assembly. Proper organization ensures a smooth and efficient building process.
4.2 Building the Frame and Walls
Start by assembling the frame using the provided metal components, ensuring all parts are aligned and securely fastened. Attach the walls to the frame, matching pre-drilled holes with bolts. Use a spirit level to ensure the structure is perfectly aligned and level. Tighten all connections firmly but avoid over-tightening. Once the frame and walls are in place, proceed to attach roof supports for added stability. Double-check all connections before moving forward.

Essential Considerations During Assembly
Ensure all tools are handled safely, and anchoring is done properly. Follow instructions carefully to avoid damage. Check local building codes.
5.1 Safety Precautions and Tool Handling
Always wear protective gear like gloves and goggles. Handle power tools with care and avoid overreaching. Keep children away during assembly. Be cautious of sharp metal edges. Ensure proper anchoring to prevent wind damage. Follow all safety guidelines in the manual to avoid accidents and ensure a secure installation.
5.2 Anchoring the Shed for Stability
Proper anchoring is crucial for stability. Use anchor kits on concrete pads or large patio stones. This prevents damage from high winds. Follow the manual’s instructions for secure installation. Ensure all bolts are tightened evenly. Double-check anchor placement before final assembly to safeguard against shifting or structural issues. A well-anchored shed ensures durability and safety, especially in harsh weather conditions.

Troubleshooting Common Issues
Address missing or damaged parts by contacting support. Check alignment and fitting issues by reviewing instructions. Ensure all components are securely fastened for stability and durability.
6.1 Addressing Missing or Damaged Parts
Begin by thoroughly inspecting all packages for completeness and damage. If parts are missing or damaged, contact Patiowell customer support immediately. Avoid returning the unit to the store without prior consultation. Refer to the provided manual for part identification and contact information. Keep the assembly manual handy for quick reference during the process.
6.2 Solving Alignment and Fitting Problems
If parts do not align properly, ensure the base is level and all components are undamaged. Check for bent or warped sections and gently straighten them using appropriate tools. Consult the manual for correct part orientation. If issues persist, refer to the assembly video or contact customer support for assistance. Proper alignment is crucial for structural integrity and weather resistance.

Maintenance and Upkeep
Regularly inspect for rust and damage. Clean the shed to prevent dirt buildup and ensure vents function properly. Protect against pests to maintain its condition and longevity.
7.1 Cleaning and Inspecting the Shed
Regular cleaning and inspections are essential for maintaining your Patiowell 10×10 shed. Remove debris and dirt from the exterior and interior to prevent damage. Check for rust spots and address them promptly. Inspect vents to ensure proper airflow, reducing moisture buildup. Examine the roof and walls for any signs of damage or wear. Regular maintenance ensures the shed remains durable and protects your stored items effectively over time.
7.2 Protecting Against Rust and Pests
To protect your Patiowell 10×10 shed from rust, apply a rust inhibitor to metal components and ensure proper ventilation to reduce moisture. Regularly inspect for signs of rust and address them immediately. For pests, seal all entry points with weatherproof seals and consider using pest deterrents. Keep the shed dry and well-ventilated to prevent mold and mildew, ensuring your belongings remain safe and the shed maintains its durability over time.

Additional Resources
Access the Patiowell 10×10 shed instructions PDF online for detailed assembly guides. Visit the official website for video tutorials and contact customer support for further assistance.
8;1 Downloading the PDF Manual
The Patiowell 10×10 shed instructions PDF is available for download on the official Patiowell website. Ensure you access it from trusted sources to avoid unauthorized versions. The manual includes detailed step-by-step guides, illustrations, and safety precautions. Before downloading, verify the file is the latest version for accuracy. Save it to your device for easy reference during assembly. This resource is essential for a smooth and successful installation process.
8.2 Viewing Assembly Videos and Tutorials
For visual guidance, Patiowell offers assembly videos and tutorials online. These resources provide step-by-step demonstrations to complement the written instructions. Videos are available on platforms like YouTube or the official Patiowell website, covering key assembly stages. Watching these can clarify complex steps and ensure accuracy. Visit the Patiowell website or YouTube channel to access these helpful guides, enhancing your understanding and assembly experience. They are designed to make the process smoother and more efficient for all users.
With these instructions, assembling your Patiowell 10×10 shed is achievable. Follow the guide carefully to ensure a sturdy, weather-resistant structure that enhances your outdoor space effectively.
9.1 Final Tips for a Successful Assembly
Ensure all components are checked before starting. Follow the manual step-by-step, using the right tools. Double-check alignments and secure all connections firmly. Anchor the shed properly for stability. Apply touch-ups if needed for any scratches. Regular maintenance will extend the shed’s lifespan. Take your time and work methodically for a flawless assembly. Proper installation ensures durability and enhances your outdoor space effectively.
9.2 Benefits of Proper Installation
Proper installation ensures the shed’s structural integrity, maximizing durability and weather resistance. It prevents issues like leaks or instability, safeguarding stored items. Correct assembly enhances safety, avoiding hazards from loose parts. A well-installed shed boosts curb appeal and property value. By following instructions, you ensure all components function optimally, providing reliable storage for years. Proper installation is key to enjoying your shed’s full potential and longevity.