
Pioneer mini split systems offer efficient‚ space-saving solutions for heating and cooling․ Their DIY-friendly designs make installation accessible for homeowners․ This guide provides a comprehensive walkthrough‚ ensuring proper setup and optimal performance․ Follow the steps carefully to achieve a successful installation and enjoy reliable climate control in your space․
Overview of Pioneer Mini Split Systems
Pioneer mini split systems are renowned for their efficiency and versatility‚ offering both cooling and heating solutions․ These systems are available in various capacities‚ ranging from 9‚000 to 36‚000 BTU/h‚ catering to different space requirements․ They feature advanced inverter technology‚ which ensures energy efficiency and consistent temperature control․ With sleek designs and quiet operation‚ Pioneer mini splits are ideal for residential and commercial spaces․ Their ductless configuration allows for flexible installation‚ making them a popular choice for homeowners seeking modern‚ space-saving climate control solutions․
Safety Precautions and Guidelines
Before starting the installation‚ ensure you follow all safety guidelines․ Always refer to the Pioneer mini split installation manual for specific instructions․ Wear protective gear‚ including gloves and safety glasses‚ when handling tools and components․ Ensure the system is turned off and disconnected from power before performing any maintenance or repairs․ Properly handle refrigerants to avoid accidents and environmental damage․ Keep the work area well-ventilated and free from flammable materials․ Adhere to local electrical codes and regulations to ensure a safe and compliant installation․ Never attempt procedures beyond your skill level without professional assistance․
System Components and Tools Required
The Pioneer mini split system includes indoor and outdoor units‚ line sets‚ and electrical components․ Essential tools include a vacuum pump‚ manifold gauges‚ and tubing cutter for proper installation․
Indoor and Outdoor Unit Specifications
The Pioneer mini split system includes an indoor unit and an outdoor unit․ Indoor units are available in various styles‚ such as wall-mounted or recessed ceiling models‚ offering sleek designs and quiet operation․ Outdoor units are durable and designed to withstand harsh weather conditions․ Specifications vary by model‚ with BTU ratings ranging from 9‚000 to 36‚000․ Proper sizing is crucial for efficiency․ Ensure the line set diameter and electrical requirements match the unit’s capacity for optimal performance․ Always refer to the manual for precise measurements and compatibility․
Essential Tools for Installation
Installing a Pioneer mini split requires specific tools to ensure a successful setup․ A vacuum pump‚ manifold gauge‚ and tubing cutter are essential for handling refrigerant lines․ A drill‚ screwdrivers‚ and wrenches are needed for mounting and connecting units․ Insulation‚ copper tubing‚ and electrical wiring tools are also necessary․ Safety gear‚ like gloves and goggles‚ should be worn․ Ensure all tools match the system’s specifications and follow the manual’s guidelines for proper use and safety precautions during the installation process․
Pre-Installation Preparation
Ensure the installation site is prepared by reviewing the manual‚ gathering tools‚ and preparing the area․ Verify local regulations and safety guidelines before starting the process․
Site Selection for Indoor and Outdoor Units
Proper site selection is crucial for optimal performance․ Choose a shaded‚ well-ventilated area for the outdoor unit to avoid direct sunlight and ensure proper drainage․ The indoor unit should be placed in a central location for even airflow distribution․ Ensure the line set can be routed without obstruction․ Keep the outdoor unit at least 12 inches away from walls and obstructions․ Verify local building codes and manufacturer guidelines for placement restrictions․ Proper positioning ensures efficiency‚ reduces noise‚ and prolongs system lifespan․ Plan carefully to avoid future issues․
Line Set and Electrical Wiring Requirements
The line set must be appropriately sized and insulated to ensure efficient refrigerant flow․ Route it to avoid kinks‚ sharp bends‚ and exposure to extreme temperatures․ Electrical wiring requires a dedicated circuit‚ with ampere and voltage ratings matching the unit’s specifications․ Always follow local electrical codes and the manufacturer’s manual for wiring connections․ Proper sizing and installation prevent energy loss‚ noise‚ and safety hazards․ Consult the manual for exact requirements to ensure reliable operation and compliance with safety standards․
Installation Steps
Begin with unboxing and preparing tools․ Mount indoor and outdoor units‚ ensuring level placement․ Connect line sets‚ drainpipes‚ and electrical wiring securely․ Test all connections for leaks and proper function before powering on the system․ Follow manual guidelines for precise steps to ensure safe and efficient installation․ Proper alignment and tightening are crucial for optimal performance and longevity of the mini split system․
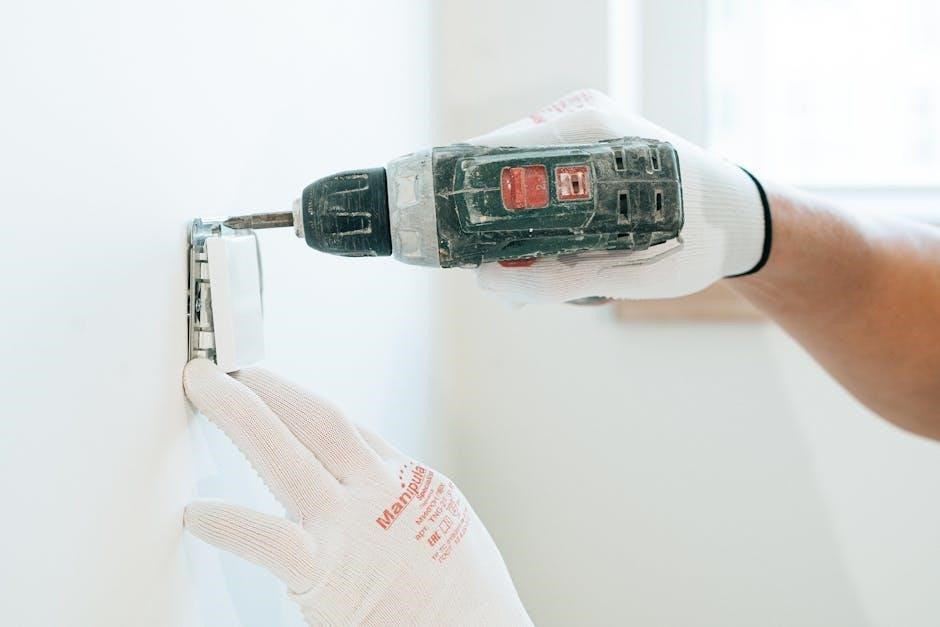
Mounting the Indoor Unit
Mounting the indoor unit requires careful planning and precision․ Choose a central location with proper drainage and avoid obstructions․ Use a spirit level to ensure the mounting bracket is perfectly horizontal․ Secure the bracket to the wall using appropriate screws‚ following the manual’s specifications․ Once the bracket is in place‚ carefully lift the indoor unit and attach it to the bracket‚ ensuring all electrical connections are secure․ Double-check the connections to prevent any future issues․ After installation‚ test the unit to ensure it operates smoothly and quietly‚ and verify that the drain is properly connected to prevent water leaks․ If uncertain‚ consider consulting a professional to ensure a safe and efficient setup․
Positioning the Outdoor Unit
Position the outdoor unit on a level‚ stable surface‚ ensuring good airflow and drainage․ Place it away from windows and doors to minimize noise and avoid interference with the system’s performance․ Ensure proper clearance from surrounding obstacles for maintenance and efficiency․ Elevate the unit slightly to improve drainage and prevent water pooling․ Follow local regulations and manufacturer guidelines for optimal placement and performance․
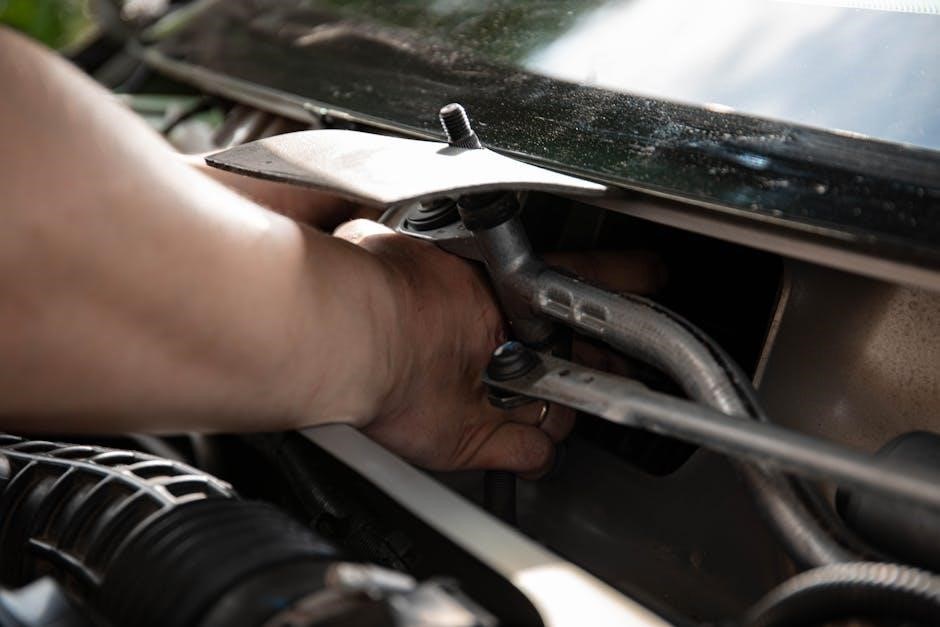
Connecting the Line Set and Drainage
Connect the line set between the indoor and outdoor units‚ ensuring it is securely fastened with insulation․ Verify the connections are leak-free by performing a pressure test․ Properly route the drainage hose to prevent water accumulation near the units․ Ensure the drain line is sloped correctly to facilitate smooth water flow․ After connecting‚ test the system under operating conditions to confirm proper functionality․ Follow the manual for specific torque and connection guidelines to avoid system damage or reduced efficiency․

Electrical Connections
Ensure correct voltage and amperage for your Pioneer mini split․ Install a dedicated circuit breaker and wiring according to local electrical codes for safe operation․
Understanding Voltage and Ampere Requirements
Understanding voltage and amperage is crucial for safe and efficient installation․ Pioneer mini splits typically require 19-25 amps‚ depending on the model․ Ensure the circuit breaker matches the system’s ampere rating․ Verify the unit’s voltage compatibility (e․g․‚ 230V) with your electrical supply․ Using the correct voltage ensures optimal performance and prevents damage․ Always consult the manual for specific requirements and install a dedicated circuit to avoid electrical hazards․ Proper electrical setup guarantees reliability and safety for your mini split system․
Installing the Circuit Breaker and Wiring
Installing a dedicated circuit breaker and wiring is essential for safe operation․ Use a 14 AWG cable for 19-25 amp systems‚ ensuring it meets local electrical codes․ Mount the breaker near the main panel‚ sizing it according to the unit’s ampere requirements․ Connect the wires to the outdoor and indoor units‚ following the manual’s wiring diagram․ Ensure all connections are secure and test the circuit for continuity before powering on․ Proper wiring ensures efficient performance and prevents electrical hazards․

Refrigerant Handling and Leak Testing
Properly evacuate and charge the system with refrigerant‚ following safety guidelines․ Use a vacuum pump to remove air and moisture‚ then charge with the recommended refrigerant type․ Test for leaks using nitrogen pressure or electronic detectors to ensure system integrity․ Always follow manufacturer instructions to avoid contamination and ensure optimal performance․ Proper handling prevents refrigerant loss and maintains efficiency․
Evacuating and Charging the System
Evacuating and charging are critical steps to ensure the mini split operates efficiently․ Begin by connecting a vacuum pump to the system to remove air and moisture‚ creating a vacuum․ Once achieved‚ recharge the system with the recommended refrigerant type and amount․ Always follow the manufacturer’s guidelines to avoid overcharging or contamination․ Proper evacuation and charging prevent refrigerant leaks‚ ensure optimal performance‚ and maintain the system’s efficiency․ Use a manifold gauge to monitor pressure levels during the process․ This step is essential for the system’s longevity and functionality․
Testing for Refrigerant Leaks
After charging the system‚ test for refrigerant leaks to ensure system integrity․ Use a nitrogen pressure test to identify potential leaks before introducing refrigerant․ Employ an electronic leak detector to pinpoint any escapes‚ especially around connections and joints․ Soap solutions can also help detect smaller leaks․ Always follow the manufacturer’s guidelines for testing procedures․ A leak-free system is crucial for optimal performance and energy efficiency․ Proper testing ensures the system operates safely and reliably‚ avoiding costly repairs and maintaining its warranty․

System Testing and Commissioning
Power on the system and check for proper operation․ Verify cooling‚ heating‚ and fan modes․ Ensure all features function correctly‚ including temperature settings and airflow direction․ Test the remote control and sensors․ Confirm there are no unusual noises or leaks․ Follow the manual’s commissioning checklist to ensure the system meets performance standards․ Proper testing ensures reliability‚ efficiency‚ and safety‚ guaranteeing optimal performance for years to come․
- Verify all modes of operation․
- Check for unusual noises or leaks․
- Ensure remote control functionality․
- Confirm sensor accuracy․
- Follow the commissioning checklist․
Powering On the System
Powering on the Pioneer mini split system involves turning on the circuit breaker and using the remote control to start operation․ Ensure the system is properly plugged in and all electrical connections are secure․ Press the power button on the remote to initiate startup․ The indoor unit will begin operating‚ and the outdoor unit will activate shortly after․ Check the display for any error codes and ensure all functions operate smoothly․ Proper initialization ensures the system runs efficiently and effectively‚ providing reliable heating or cooling as needed․
- Flip the circuit breaker to the “on” position․
- Use the remote control to power on the system․
- Verify the display for normal operation․
- Ensure both indoor and outdoor units are active․
Checking for Proper Operation
After powering on the Pioneer mini split system‚ verify proper operation by checking airflow‚ temperature‚ and system responsiveness․ Ensure the remote control functions correctly and adjust settings as needed․ Listen for unusual noises‚ which could indicate installation issues․ Check the display for error codes and refer to the manual or online resources for troubleshooting․ Confirm that both indoor and outdoor units are operating in unison․ Perform a visual inspection for any signs of refrigerant leaks․ Ensure consistent temperature maintenance and proper airflow distribution for optimal performance․
- Verify airflow and temperature output․
- Check for unusual noises during operation․
- Ensure remote control functionality․
- Inspect for error codes on the display․
- Confirm simultaneous operation of both units․
- Check for signs of refrigerant leaks․
- Ensure consistent temperature maintenance․
- Verify proper airflow distribution․

Troubleshooting Common Issues
Pioneer mini split systems may encounter issues like error codes‚ refrigerant leaks‚ or electrical problems․ Always refer to the manual for specific solutions and guidelines․
- Check for error codes and consult the manual․
- Inspect for refrigerant leaks or low refrigerant levels․
- Verify electrical connections and wiring integrity․
- Ensure proper installation and system balancing․
Diagnosing Error Codes
Error codes on Pioneer mini splits indicate specific issues․ The manual provides detailed explanations for each code‚ such as the 88 code‚ which signals wiring problems between units․ Always consult the manual first to identify the error․ Verify wire connections and colors to ensure proper setup․ If issues persist‚ use diagnostic tools like a gauge manifold to check system performance․ Regular maintenance and proper installation can prevent many error code scenarios․ Addressing codes promptly ensures optimal system operation and extends equipment lifespan․
Resolving Freon Leaks and Electrical Issues
Freon leaks and electrical problems require immediate attention to prevent system damage․ Inspect line sets for cracks or improper connections‚ and use a pressure test kit to identify leaks․ For electrical issues‚ verify wiring connections and circuit breakers․ Ensure all components are properly grounded and meet voltage requirements․ If a refrigerant leak is detected‚ evacuate the system and recharge it after repairs․ Always follow safety guidelines and use appropriate tools to avoid further damage․ Regular maintenance can help prevent such issues from arising․
Maintenance and Upkeep
Regular cleaning of filters and coils ensures optimal performance․ Schedule professional maintenance annually to inspect and service components‚ preventing wear and potential leaks or electrical issues․
Cleaning Filters and Coils
Regularly cleaning the air filters and coils is essential for maintaining efficiency and performance․ Washable filters should be cleaned every 1-2 months with mild soap and water․ Replace disposable filters as recommended․ For coils‚ gently brush away dust and debris to ensure proper airflow․ Neglecting these tasks can lead to reduced cooling capacity and increased energy consumption․ Always turn off the power before performing any maintenance to avoid damage or safety risks․
- Clean filters every 1-2 months for optimal performance․
- Inspect and clean coils seasonally to prevent dust buildup․
- Ensure power is off before starting maintenance tasks․
Scheduling Regular Maintenance
Regular maintenance is crucial for ensuring the longevity and efficiency of your Pioneer mini split system․ Schedule professional inspections annually to check refrigerant levels‚ electrical connections‚ and overall system performance․ Additionally‚ clean filters and coils regularly to maintain airflow and efficiency․ Addressing minor issues promptly prevents major repairs․ A well-maintained system provides consistent comfort and reduces energy costs over time․ Always refer to the manual for specific maintenance recommendations tailored to your unit․
- Schedule annual professional inspections for optimal performance․
- Check and clean filters and coils regularly for better airflow․
- Address minor issues promptly to prevent costly repairs․