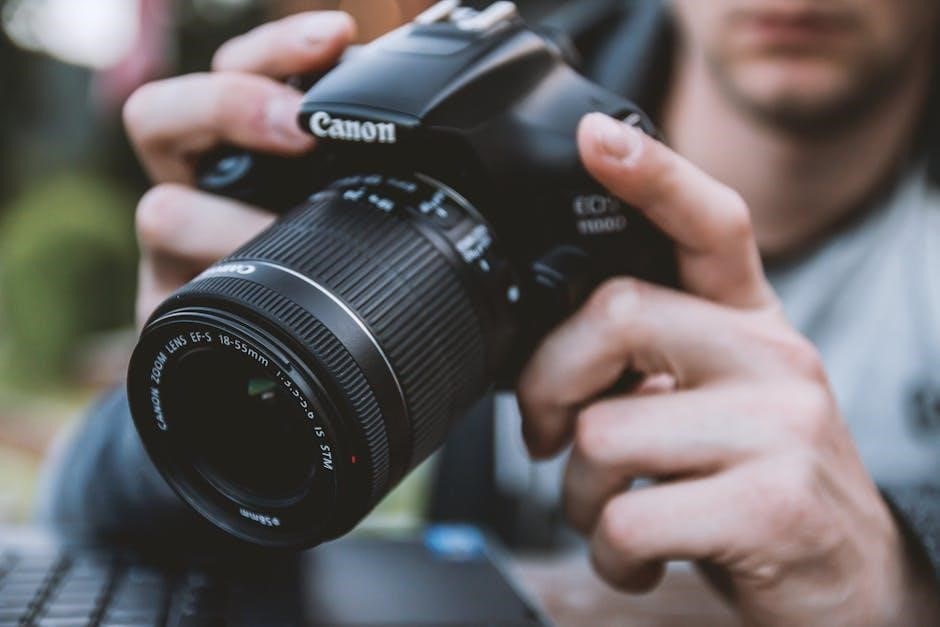
Manual mode empowers photographers to take full creative control by adjusting aperture, shutter speed, and ISO, enabling tailored exposures and artistic expression beyond auto settings.
What is Manual Mode?
Manual mode is a camera setting that allows photographers to gain full control over exposure by manually adjusting aperture, shutter speed, and ISO. Unlike automatic modes, it enables creative freedom, letting the photographer decide how each element contributes to the final image. This mode is ideal for those seeking precision and artistry, as it bypasses the camera’s auto-settings, ensuring the desired aesthetic is achieved consistently across shots.
Why Use Manual Mode?
Manual mode offers full control over aperture, shutter speed, and ISO, allowing photographers to achieve precise exposures tailored to their creative vision. It bypasses auto-settings, ensuring consistency across shots and enabling artistic expression. This mode is essential for capturing images exactly as envisioned, especially in challenging lighting conditions where auto modes often fail. By mastering manual mode, photographers can overcome limitations of automatic settings and unlock greater creative potential, making it indispensable for professional-grade results.
Understanding the Basics of Manual Mode
Manual mode requires mastering the exposure triangle—aperture, shutter speed, and ISO—to control light and achieve desired effects in photography, ensuring creative precision and consistency in every shot.
The Exposure Triangle: Aperture, Shutter Speed, and ISO
The exposure triangle—aperture, shutter speed, and ISO—forms the foundation of manual mode photography. Aperture controls light entry and depth of field, shutter speed freezes or blurs motion, while ISO adjusts light sensitivity. Balancing these elements ensures proper exposure, creative control, and desired effects. Understanding their interplay is key to mastering manual mode, allowing photographers to achieve precise results tailored to their artistic vision. Each adjustment impacts the final image, making the exposure triangle essential for capturing light effectively and creatively.
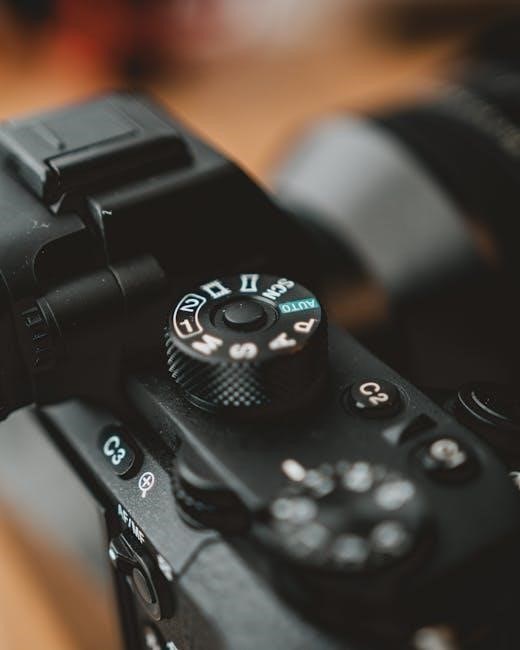
How to Adjust Settings in Manual Mode
To adjust settings in manual mode, start by selecting aperture, shutter speed, and ISO based on your desired outcome. Use the camera’s command dials to modify these settings—typically, one dial for aperture and another for shutter speed. Monitor the light meter to ensure proper exposure, adjusting settings until the meter aligns with your creative vision. Fine-tune using exposure compensation if needed. Regular practice helps streamline this process, enabling quick and precise adjustments for consistent results in various lighting conditions.
Aperture in Manual Mode
Aperture is a fundamental setting in manual mode, regulating light entry and depth of field. Adjusting it allows creative control over focus and background blur.
What is Aperture?
Aperture is the opening in the camera lens that controls the amount of light entering the sensor. Measured in f-stops (e.g., f/2.8 or f/16), it determines how wide or narrow the opening is. A smaller f-stop value means a larger aperture, allowing more light in, while a larger f-stop value means a smaller aperture, letting less light through. Aperture is a key component of the exposure triangle and plays a crucial role in achieving the desired aesthetic in manual mode photography.
How Aperture Affects Your Photos
Aperture directly influences the depth of field and light intake in your images. A larger aperture (smaller f-stop) creates a shallower focus, blurring backgrounds, while a smaller aperture (larger f-stop) sharpens more of the image. This control allows for creative emphasis on subjects or scenes. Balancing aperture with shutter speed and ISO is essential for achieving the desired exposure and aesthetic in manual mode photography.
Using Aperture to Control Depth of Field
Aperture is a powerful tool for controlling depth of field, determining how much of your image is in focus. A large aperture (small f-stop) creates a shallow depth of field, blurring backgrounds and isolating subjects, ideal for portraits. Conversely, a small aperture (large f-stop) keeps more of the image sharp, perfect for landscapes or group shots. Mastering aperture allows you to guide the viewer’s attention and enhance storytelling in your photos, giving you precise creative control over focus and composition.
Shutter Speed in Manual Mode
Shutter speed controls exposure duration, allowing photographers to freeze or blur motion, enhancing image dynamics and artistic expression with greater control for desired effects.
What is Shutter Speed?
Shutter speed refers to the length of time the camera’s shutter remains open, measured in seconds or fractions of a second. It determines how motion is captured, allowing photographers to freeze fast-moving subjects or create artistic blur. A faster shutter speed (like 1/1000th of a second) stops motion sharply, while a slower speed (like 1 second) creates motion blur. This setting is crucial for controlling the dynamic effects of movement and light in a photograph, offering creative control over the visual narrative of the image.
How Shutter Speed Affects Motion in Photos
Shutter speed plays a vital role in capturing motion by determining how movement is represented in a photo. A fast shutter speed freezes action, creating sharp images of moving subjects, while a slow shutter speed introduces blur, conveying motion and dynamism. This control allows photographers to artistically interpret movement, whether freezing a fleeting moment or creating a sense of fluidity. Balancing shutter speed with other exposure settings ensures desired effects, making it a powerful tool for creative expression in photography.
Using Shutter Speed to Freeze or Blur Motion
Shutter speed is a powerful tool in manual mode, allowing photographers to control motion representation. Fast shutter speeds, typically above 1/500th of a second, freeze action, capturing sharp images of moving subjects. Slow shutter speeds, often below 1/30th of a second, create motion blur, conveying dynamism and fluidity. Photographers can choose between freezing fleeting moments or generating artistic blur by adjusting this setting. This creative control enhances storytelling in photography, enabling unique visual expressions.
ISO in Manual Mode
ISO controls light sensitivity, balancing exposure with aperture and shutter speed. Lower ISOs reduce noise, while higher ISOs enable low-light shooting, though risking grain or digital noise.
What is ISO?
ISO (International Organization for Standardization) refers to a camera’s light sensitivity setting. It is measured in numerical values (e.g., ISO 100, ISO 6400) and determines how sensitive the sensor is to light. In manual mode, ISO is a fundamental control, allowing photographers to adjust light capture without changing aperture or shutter speed. Lower ISOs (e.g., ISO 100) reduce noise and are ideal for bright conditions, while higher ISOs (e.g., ISO 6400) enable shooting in low light but may introduce grain or digital noise. ISO is essential for achieving desired exposures in various lighting scenarios.
How ISO Affects Image Quality
ISO directly impacts image quality by controlling light sensitivity. Lower ISOs (e.g., ISO 100) reduce noise and grain, producing sharper images in bright conditions. Higher ISOs (e.g., ISO 6400) allow shooting in low light but may introduce digital noise or grain, softening details. Balancing ISO with aperture and shutter speed is crucial for optimal results. Proper ISO adjustment ensures vibrant, clear photos without compromising quality, making it a vital tool in manual mode photography for achieving desired aesthetic outcomes.
Using ISO to Control Light Sensitivity
ISO regulates the camera’s light sensitivity, allowing photographers to adjust for varying lighting conditions; Lower ISOs (e.g., ISO 100) are ideal for bright environments, minimizing noise and grain. Higher ISOs (e.g., ISO 6400) capture images in low light but may introduce digital noise. By balancing ISO with aperture and shutter speed, photographers can achieve well-exposed images. This control enables creative decisions about brightness and grain, ensuring optimal results in both challenging and favorable lighting scenarios while maintaining image quality.
Advanced Techniques in Manual Mode
Manual mode offers advanced techniques like metering modes, exposure compensation, and white balance control, allowing photographers to refine their images, ensure consistency, and achieve professional-grade results.
Understanding Metering Modes
Metering modes determine how your camera measures light in a scene. Common modes include Evaluative/Matrix, Center-Weighted, and Spot metering. Evaluative considers the entire scene, while Center-Weighted focuses on the center. Spot metering measures light from a specific area, ideal for backlit subjects. Understanding these modes helps photographers achieve accurate exposures, especially in manual mode. By selecting the right metering mode, you can ensure your camera captures the desired brightness and contrast, leading to more control over your final image’s lighting and overall appearance.
Using Exposure Compensation
Exposure compensation allows photographers to fine-tune the brightness of an image beyond the camera’s metered settings. In manual mode, this tool is invaluable for achieving precise results. By adjusting the exposure compensation, you can brighten overexposed areas or darken underexposed regions. This is particularly useful in high-contrast scenes or when the metering mode doesn’t accurately capture the desired lighting. Exposure compensation ensures your images are neither too bright nor too dark, giving you greater control over the final look of your photos while maintaining creative intent and technical accuracy in your shots. This feature is essential for refining exposures and achieving professional-grade results.
Mastering White Balance in Manual Mode
White balance in manual mode ensures accurate color representation by setting the correct color temperature. It enhances image quality and mood, allowing photographers to achieve natural hues or creative effects. Unlike auto modes, manual control offers precision, especially under challenging lighting conditions. Understanding white balance is key to professional-grade results, enabling photographers to capture scenes as they truly appear or to create artistic interpretations, thus elevating their work through precise color management and creative expression.
Common Challenges in Manual Mode
Manual mode often presents challenges like overexposure, underexposure, and focusing on fast-moving subjects, requiring precise adjustments and practice to master consistent and desired photographic outcomes effectively.
Overcoming Overexposure and Underexposure
Mastering manual mode requires balancing exposure to avoid overexposure, which washes out details, and underexposure, which darkens images. Use your camera’s light meter to gauge settings. Adjust aperture, shutter speed, or ISO incrementally to achieve proper exposure. Bracketing shots helps capture a range of exposures for later combination. Pay attention to highlights and shadows, as overexposure can lose detail in bright areas, while underexposure hides details in shadows. Practice and understanding the exposure triangle are key to consistent results and mastering manual mode effectively;
Dealing with Fast-Moving Subjects
Capturing fast-moving subjects in manual mode requires precise control over shutter speed to freeze or blur motion. A faster shutter speed (1/1000th of a second or higher) is ideal for freezing action, while slower speeds create artistic blur. Use continuous autofocus and burst mode to track subjects. Adjust ISO to maintain proper exposure without overexposing. Practice anticipation and timing to frame the shot effectively. Balancing these settings ensures sharp, dynamic images of moving subjects, whether in sports, wildlife, or street photography scenarios.
Troubleshooting Common Issues
When shooting in manual mode, common issues like overexposure or underexposure can arise. Check your camera’s light meter to ensure proper exposure balance. If images are blurry, adjust shutter speed for sharper results or use a tripod for stability. For low-light situations, increase ISO cautiously to avoid noise. Regularly review your photos to identify patterns in errors and adjust settings accordingly. Using bracketing and reviewing histograms can help prevent issues before they occur, ensuring consistent and high-quality results in manual mode photography.
Best Practices for Shooting in Manual Mode
Mastering manual mode requires understanding the Exposure Triangle, using the light meter for guidance, and bracketing shots to capture optimal dynamic range, ensuring consistent results.
Starting with a Base Exposure
Begin by setting a base exposure using the light meter as a guide. Adjust aperture, shutter speed, and ISO to balance the exposure triangle. Start with a neutral setting, then fine-tune based on the scene. Bracketing shots ensures capturing a range of exposures, which can later be merged for optimal dynamic range. Consistency across images is key, especially in varying light conditions. This approach helps in achieving the desired aesthetic while maintaining technical accuracy in your photographs.
Using the Camera’s Light Meter
The camera’s light meter is a vital tool in manual mode, helping you gauge the perfect exposure. It analyzes the scene and provides a reading to guide your adjustments. Pay attention to the meter’s indicator, aiming for a balanced exposure by tweaking aperture, shutter speed, or ISO. Consistency is key; if images vary in brightness, it often signals a need to refine your settings. Use the meter as a starting point, then fine-tune based on the scene’s lighting and your creative vision.
Bracketing Shots for Maximum Dynamic Range
Bracketing involves capturing multiple shots of the same scene at different exposures to merge later, ensuring maximum dynamic range. This technique is especially useful in high-contrast lighting, where details in shadows or highlights might otherwise be lost. By taking a series of exposures, from underexposed to overexposed, you can combine them to create a single image with richer detail and color accuracy. A tripod is essential for alignment, and this method ensures professional-grade results with optimal clarity and depth in your photos.
When to Use Manual Mode
Manual mode is ideal for creative control in portraits, landscapes, action shots, and low-light conditions, allowing precise adjustments to capture the desired mood and detail in photos.
Portrait Photography
Manual mode is perfect for portrait photography, offering precise control over depth of field to isolate subjects and blur backgrounds. By adjusting aperture, shutter speed, and ISO, photographers can create soft, natural lighting or dramatic effects. This mode allows for creative control to capture the desired mood, ensuring sharp focus on faces while softly rendering surroundings. It also enables consistent results in varying lighting conditions, making it ideal for professional and artistic portrait work.
Landscapes and Still Life
Manual mode is ideal for landscapes and still life, allowing precise control over depth of field and lighting. By adjusting aperture, you can ensure sharp focus across the scene or create a shallow depth of field for selective focus. Shutter speed can capture dynamic effects like flowing water or cloudy skies, while ISO fine-tunes light sensitivity. This control enables photographers to achieve detailed, high-quality images with rich textures and vibrant colors, making manual mode essential for capturing serene and artistic compositions.
Action and Sports Photography
Manual mode is essential for action and sports photography, enabling precise control over settings to freeze or blur motion. Faster shutter speeds (1/1000th of a second or higher) capture sharp, dynamic moments, while slower speeds create artistic blur. Aperture and ISO must be adjusted to ensure proper exposure, with lower ISO minimizing noise in bright conditions. This control allows photographers to deliver crisp, high-energy images that convey the intensity of fast-paced events, making manual mode indispensable for capturing fleeting action with clarity and precision.
Low Light and Night Photography
Manual mode excels in low-light and night photography by allowing precise control over exposure settings. Lowering shutter speed or widening aperture lets more light in, while adjusting ISO balances noise and brightness. This flexibility helps capture sharp, detailed images in dim conditions without relying on auto settings. Manual mode ensures photographers can fine-tune their shots to handle challenging lighting, preserving detail in both shadows and highlights for stunning nighttime results.
Mastering manual mode unlocks creative control, enabling photographers to craft exposures that reflect their vision. Consistent practice and understanding of aperture, shutter speed, and ISO lead to professional results.
Final Tips for Mastering Manual Mode
To truly master manual mode, practice consistently and experiment with different settings. Understand the exposure triangle and how aperture, shutter speed, and ISO interact. Use metering modes to gauge light accurately and adjust exposure compensation as needed. Shoot in RAW for greater flexibility in post-processing. Stay patient and observant, as manual mode requires active engagement with your environment and subject. Continuous learning and hands-on practice will refine your skills and elevate your photography to new heights.
Continuous Learning and Practice
Mastering manual mode requires dedication and consistent practice. Start by understanding the exposure triangle and gradually experiment with different settings. Regularly review your photos to identify areas for improvement. Engage with photography communities and tutorials to refine your skills. Practice in various lighting conditions to gain confidence. Over time, manual mode will become second nature, allowing you to focus on creativity and capturing moments with precision and artistry.